
Brose: installation
With a Brose drive, the Rohloff E-14 2.0 works in its DS (Direct Shifting) version: shifting is started by the E-14 Trigger on the handlebar, and a DC/DC-DS Converter supplies power and communication from the drive battery — no separate battery needed. This page shows how the system is built and the Brose-specific fitting steps; the general information is in the linked articles. Fitting the converter means taking the motor out — we suggest leaving it to us: book an appointment.
System overview
Section titled “System overview”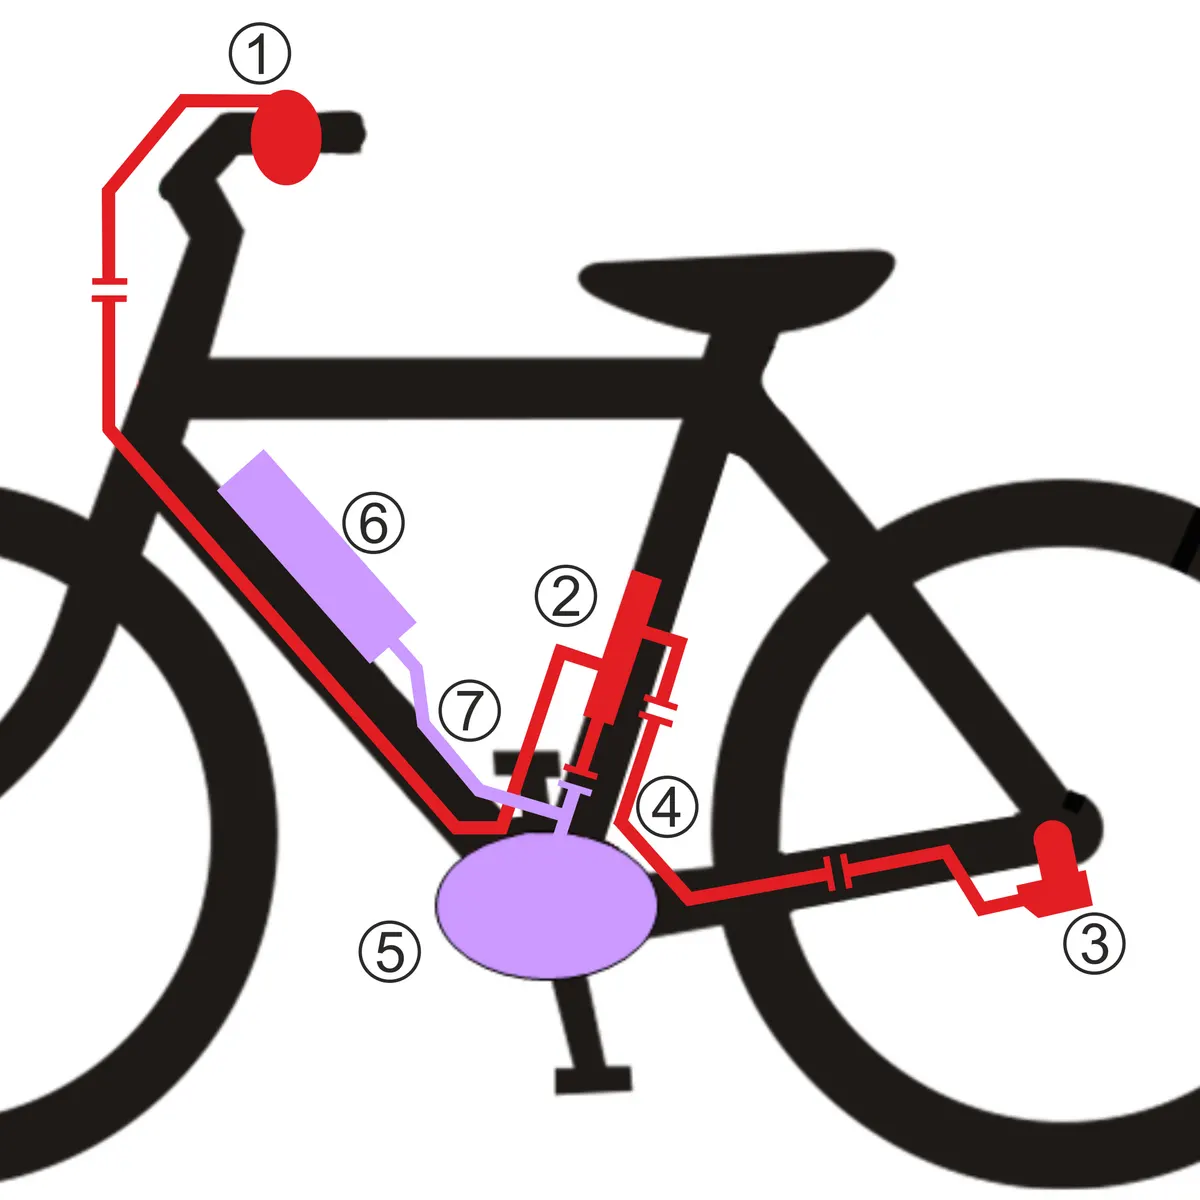
| Pos. | Part | Art. no. |
|---|---|---|
| 1 | E-14 Trigger | 8801-04H |
| 2 | E-14 2.0 DC/DC-DS Converter | 8802-06 |
| 3 | E-14 2.0 shift unit | 8803-04 |
| 4 | E-14 connecting cable | 8804–8810 |
| 5 | drive motor | — |
| 6 | battery | — |
| 7 | the drive’s own cable (the drive’s H-cable), which the converter connects to | — |
The purple parts belong to the drive system’s maker. The facing T-marks show the plug connections between cables.
- Trigger — two levers: “+” shifts towards gear 14, “−” towards gear 1. Fits 22–22.3 mm handlebars, on the right-hand side only. Connects to the converter with a blue, 4-pin Higo connector.
- DC/DC-DS Converter — the electronic link between the drive system and the E-14: it powers the components and passes on communication. It usually goes in the down tube or seat tube (in the seat tube, mind the seatpost’s adjustment range). On a Brose drive, it connects to the drive’s H-cable. Fitting: fitting the DC/DC-DS Converter.
- Shift unit — the electromechanical unit that shifts the SPEEDHUB’s gears. Connects via the connecting cable to the converter with a purple, 6-pin Higo connector.
- Connecting cable — runs between the converter in the middle of the frame and the shift unit at the rear wheel. Choose the length to suit the frame and cable route:
| Art. no. | 8804 | 8805 | 8806 | 8807 | 8808 | 8809 | 8810 |
|---|---|---|---|---|---|---|---|
| Length | 400 mm | 500 mm | 600 mm | 700 mm | 800 mm | 900 mm | 1000 mm |
Fitting the Trigger
Section titled “Fitting the Trigger”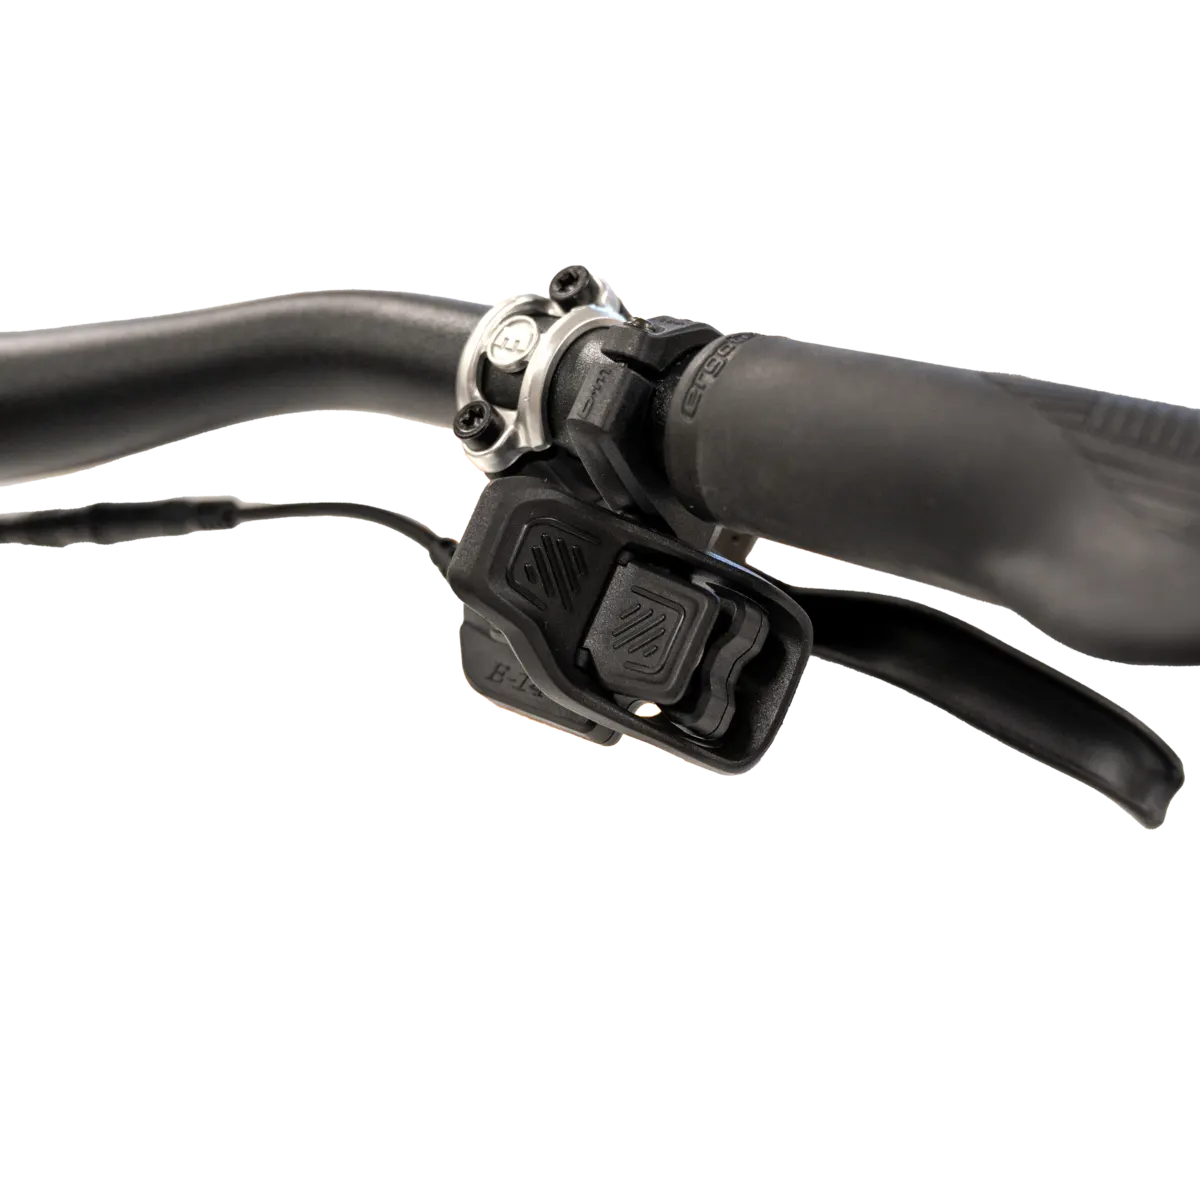
The Trigger fits only on the right-hand side of the handlebar, between grip and brake lever — not on the left.
- Unscrew the clamp’s two screws (TX10) and take the clamp off.
- Place the Trigger between brake lever and grip with its cable pointing towards the middle of the bar. Position it so it does not obstruct the brake lever and you can reach both levers comfortably with thumb and forefinger.
- Refit the clamp the right way round: wide side forward, in line with the Trigger’s guide. It must slide onto the bar without resistance — do not force it.
- Gently screw in the front screw until there is no gap, and tighten it to 0.8 Nm; then the rear one, also to 0.8 Nm. The Trigger should now sit firmly.
- Pull the brake lever and check it touches neither the Trigger nor anything else.
- Connect the Trigger’s blue, 4-pin plug to the converter’s blue, 4-pin socket.
Route and fix the cable on the handlebar and frame so it cannot kink, twist or get trapped when steering or using the brake lever. Where it passes through the frame, make sure it cannot chafe. The cable must never hinder steering or any other part on the handlebar.
Do not clean the Trigger with a pressure washer; a soft cloth lightly dampened with water is enough. No cleaning agents, oil or silicone spray.
Cables and connectors
Section titled “Cables and connectors”| Connection | Connector |
|---|---|
| Converter – Brose drive | Higo, blue, 4-pin |
| Trigger – converter | Higo, blue, 4-pin |
| Shift unit – converter | Higo, purple, 6-pin |
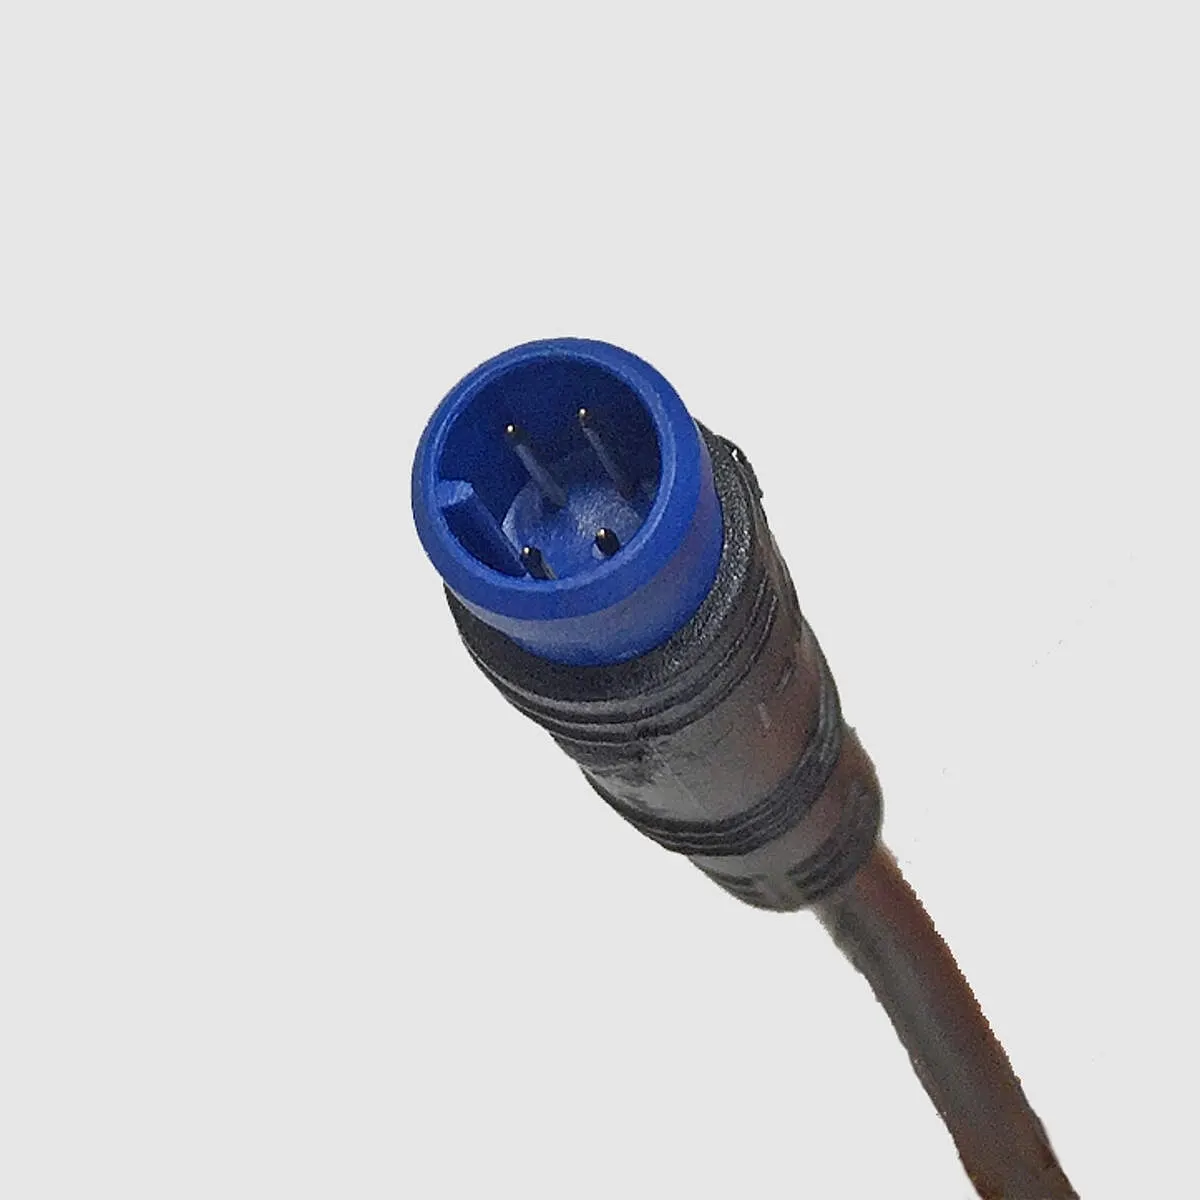
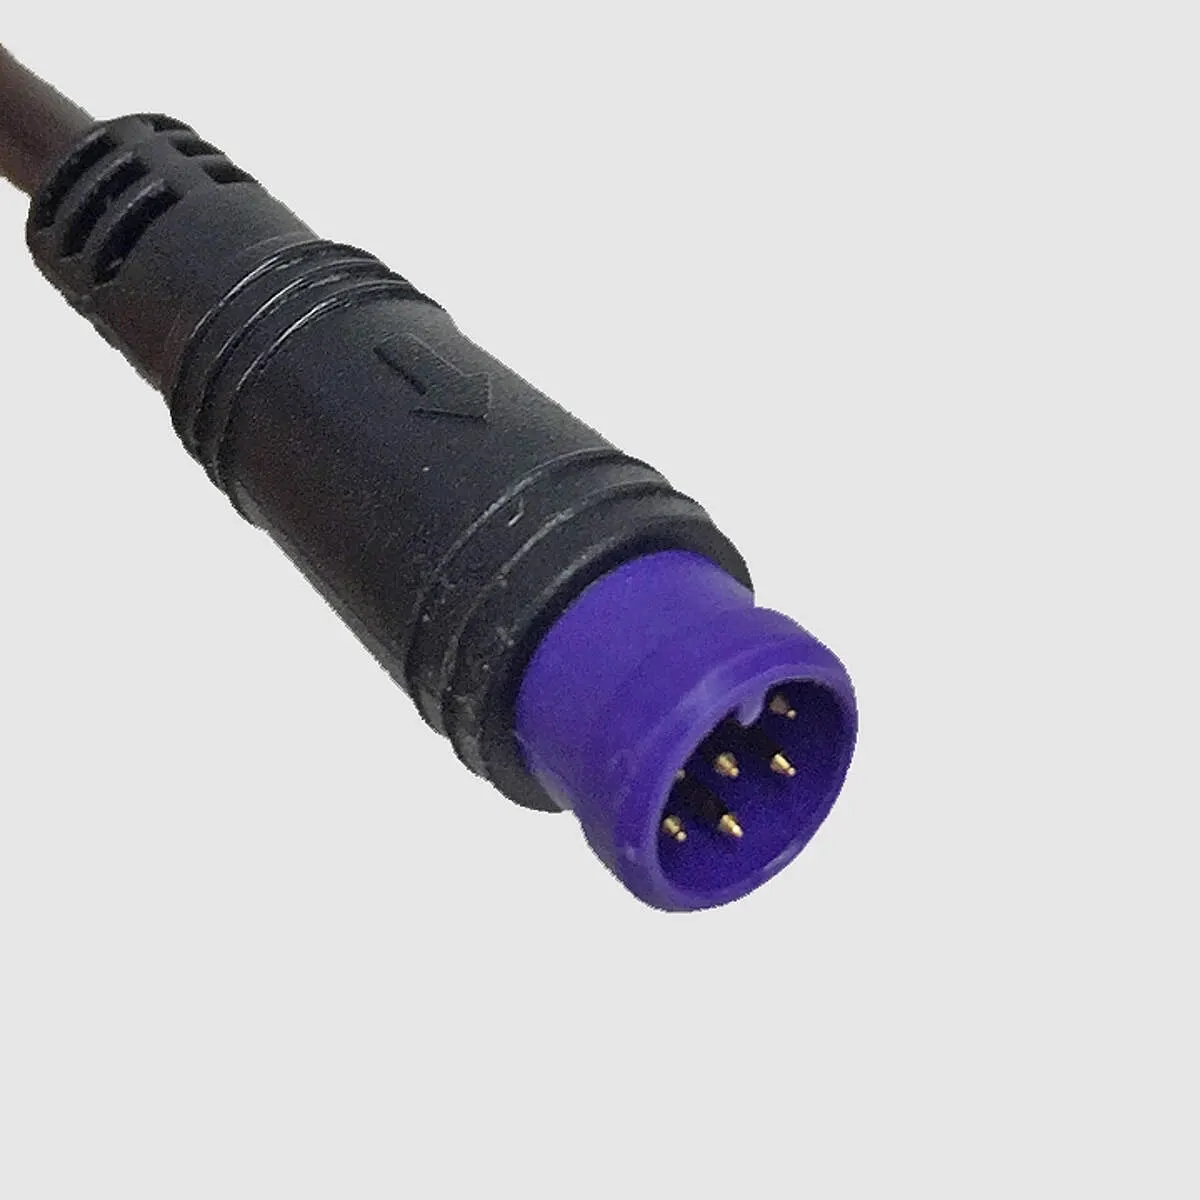
The cables and connectors of the Trigger, converter and shift unit cannot be replaced separately — if damaged, the whole component has to be replaced.
- Switch the system off before separating anything. Reconnect a separated connector no sooner than 10 minutes after switching the drive off.
- Fix the shift unit’s connector at the rear wheel securely to the frame, so it cannot get into the spokes or the brake disc.
- Do not use contact spray in the connectors.
For separating and joining the connectors correctly, and handling the cables, see cables and connectors.
Removing and fitting the wheel
Section titled “Removing and fitting the wheel”-
Switch the Brose system off and take the battery out.
-
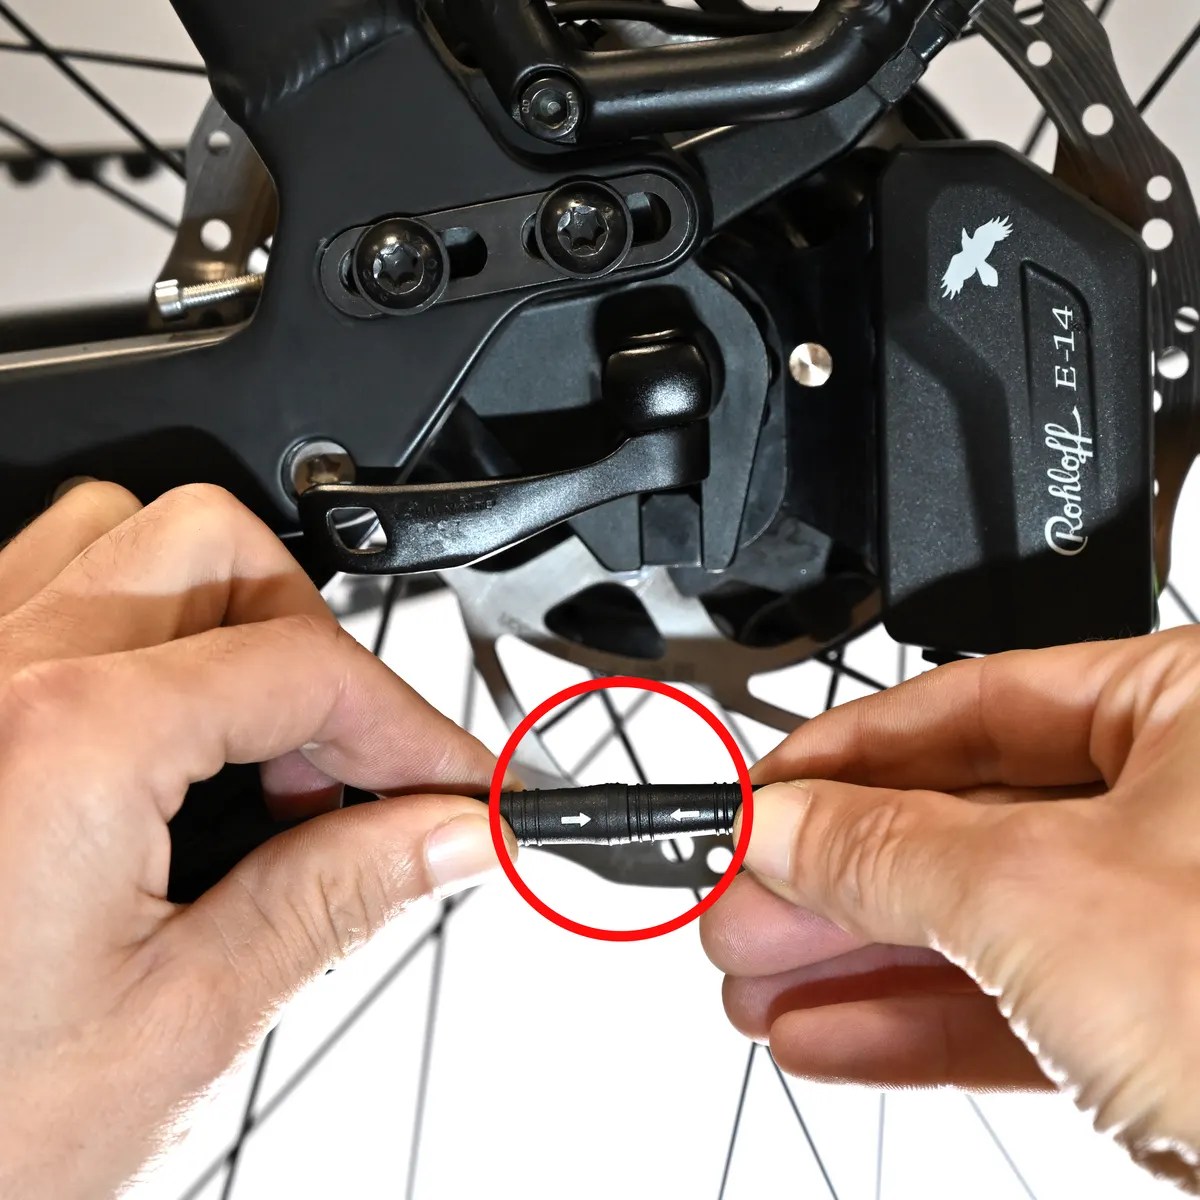
Separate the shift unit’s connector at the rear wheel.
-
Remove the wheel together with the shift unit: Removing the rear wheel.
Fitting is the reverse (Fitting the rear wheel): reconnect the connector, put the battery back and switch the system on. More on the E-14 specifics: removing and fitting the wheel with an E-14.
Shift unit and brake disc
Section titled “Shift unit and brake disc”Some jobs — changing the brake disc or the shift unit, or relacing the wheel — need the shift unit taken off the SPEEDHUB: removing and fitting the shift unit. For fitting a brake disc with an E-14, see brake disc with an E-14.
Frequently asked questions
- Which side does the E-14 Trigger go on?
- Only on the right of the handlebar, between grip and brake lever, on a 22–22.3 mm bar. The clamp's two TX10 screws are tightened to 0.8 Nm — the front one first, then the rear.