
Chain tensioner and chain guide
The SPEEDHUB has a single sprocket, so chain length is taken up not by a derailleur but by the frame or a chain tensioner. If the frame cannot tension the chain — with a sliding Rohloff OEM dropout, a horizontal dropout or an eccentric bottom bracket — you need a chain tensioner. On full suspension, always.
The Rohloff chain tensioner
Section titled “The Rohloff chain tensioner”The Rohloff chain tensioner (Art. no. 8250) takes up 10 links and screws into the frame’s derailleur hanger. Its sideways position is set to the chainline with spacer washers.
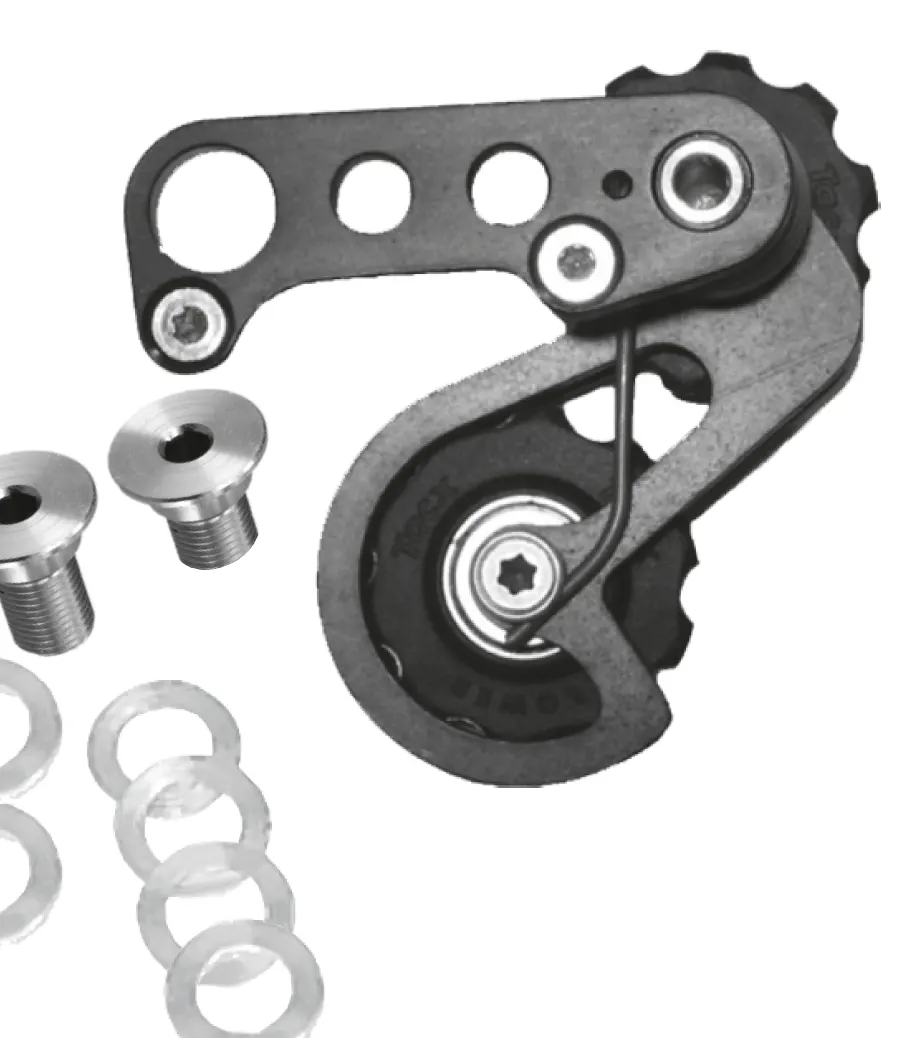
The kit includes a long and a short fixing bolt and six spacers (4 × 1 mm, 2 × 3 mm), which combine to any thickness from 1 to 10 mm. The thickness you need (B) depends on the dropout thickness (A) and the chainline:
| Dropout thickness (A) | B, 54 mm chainline | B, 57–58 mm chainline |
|---|---|---|
| 4 mm | 6 mm | 10 mm |
| 5 mm | 5 mm | 9 mm |
| 6 mm | 4 mm | 8 mm |
| 7 mm | 3 mm | 7 mm |
| 8 mm | 2 mm | 6 mm |
| 9 mm | 1 mm | 5 mm |
| 10 mm | 0 mm | 4 mm |
The 54 mm chainline is that of the old threaded 15–21-tooth sprockets; 57–58 mm is that of the splined sprockets and the threaded 13-tooth one.
-
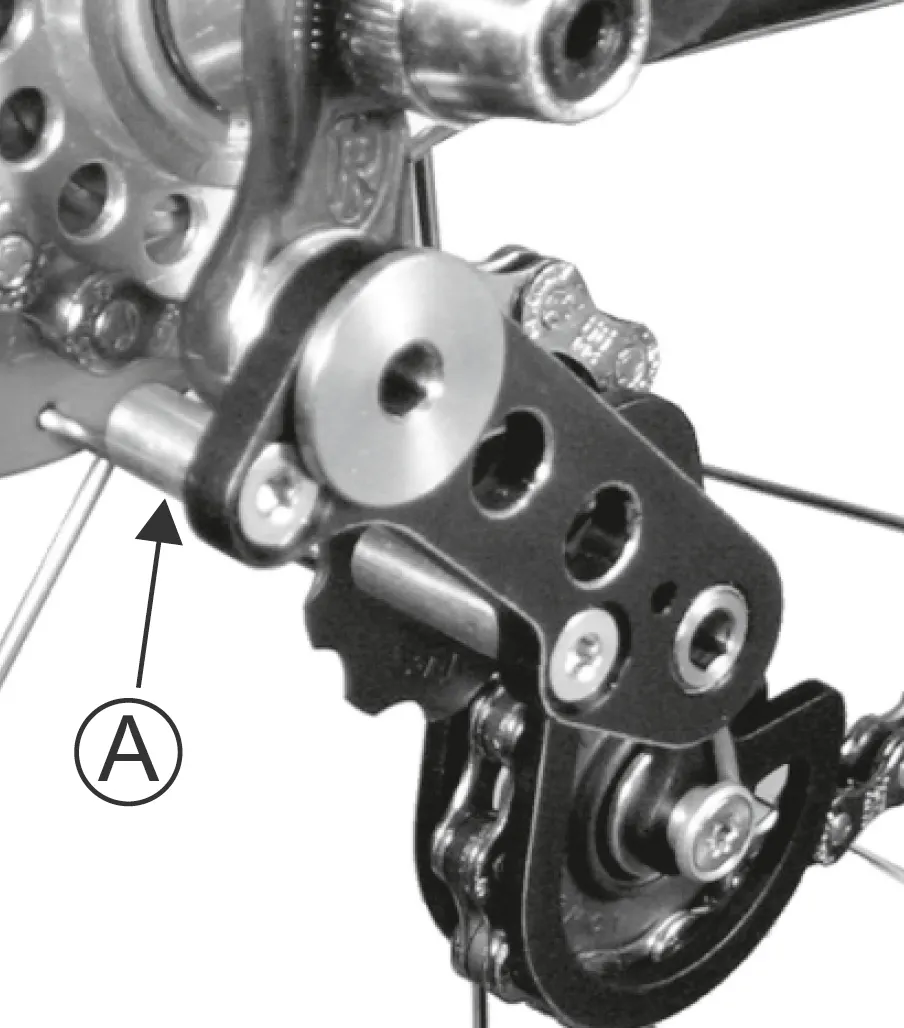
Bolt the tensioner to the hanger so that pin A sits against the hanger’s stop (5 mm Allen, 8 Nm, lightly grease the bolt).
-
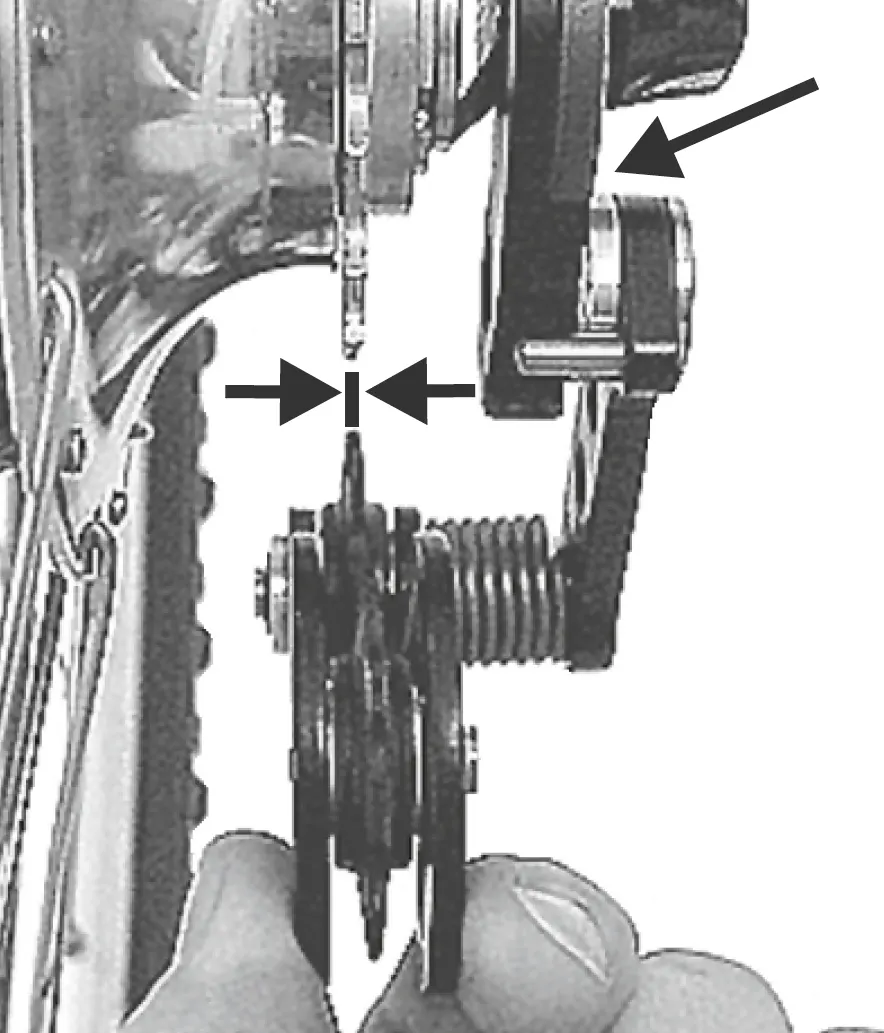
Check that the upper pulley lines up with the sprocket. If not, add or remove spacers.
Chain length
Section titled “Chain length”-
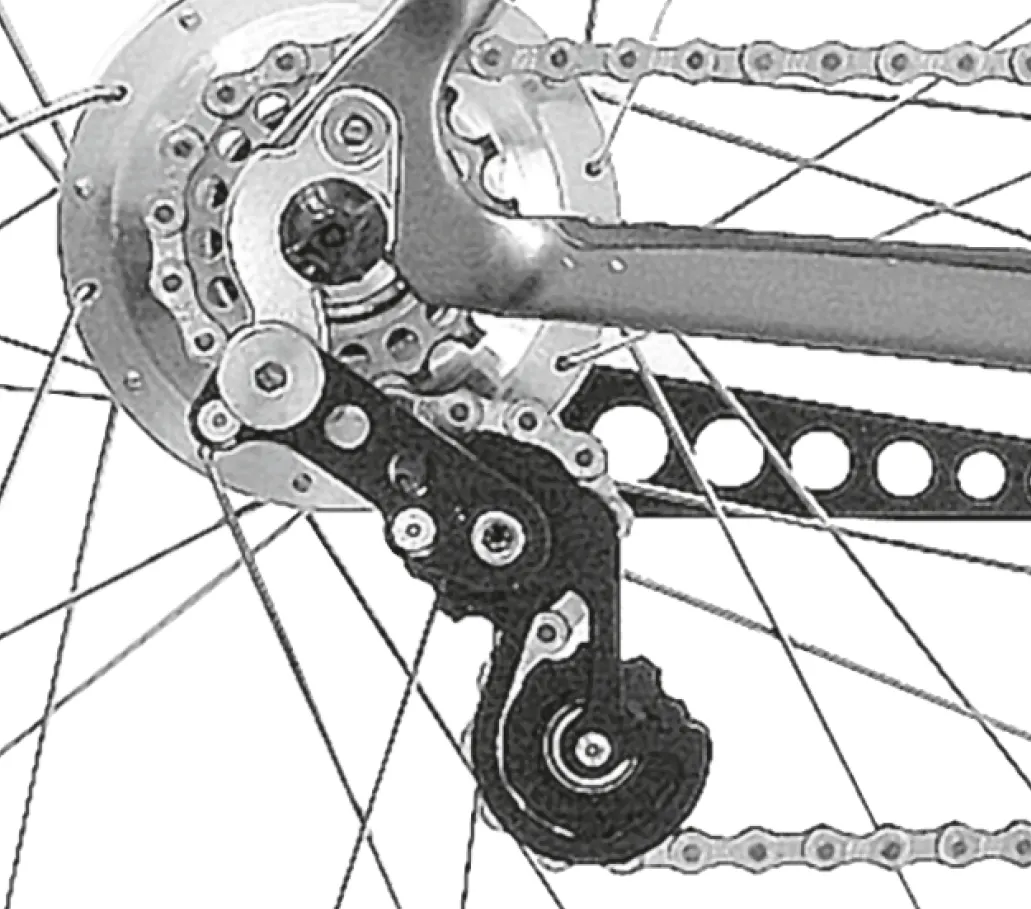
Route the new chain over the chainring, the sprocket and through the tensioner.
-
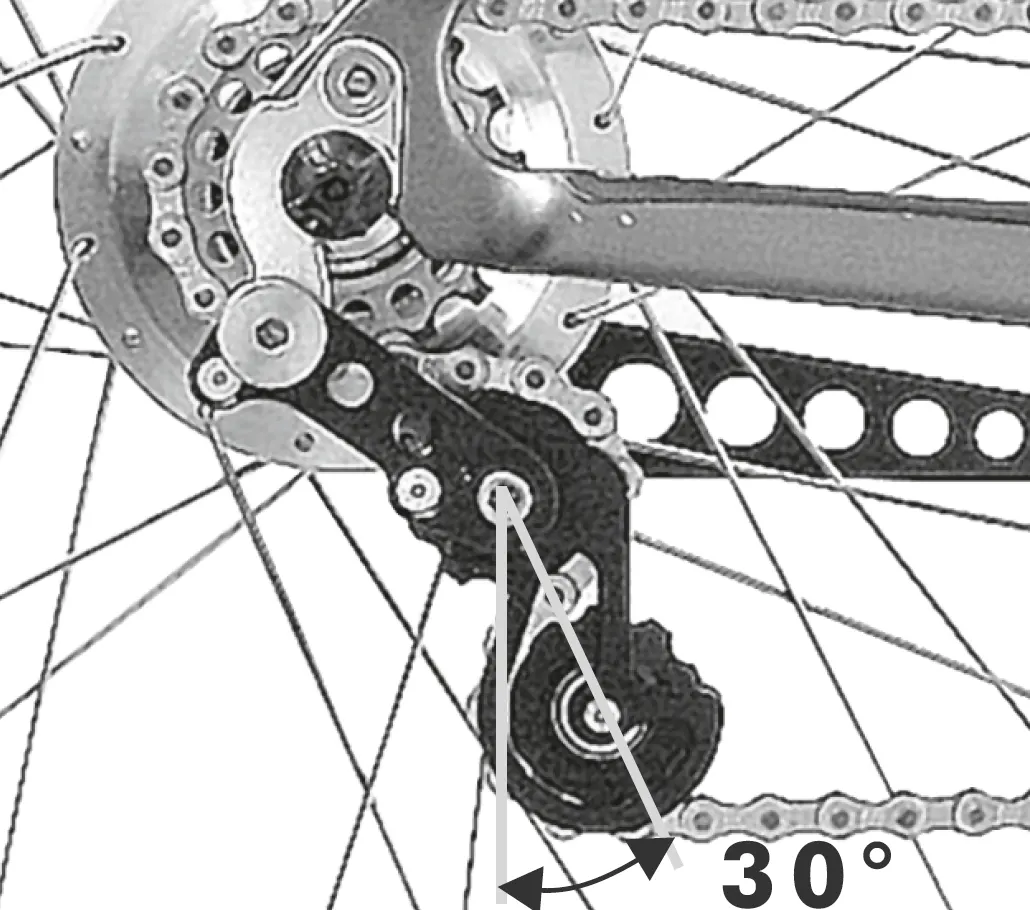
On a rigid rear end, choose the length so that the tensioner cage points straight down, or at most 30° forwards.
-
On full suspension, compress the rear end fully (by removing the shock, for example). If the lower pulley ends up higher than the upper one, or the cage hits the chainstay, the chain is too short — lengthen it.
Without a chain tensioner (sliding dropout, long horizontal dropout, eccentric bottom bracket): set the adjustment to the shortest chain length, remove the surplus links and close the chain as its maker specifies. Then tension it until it just no longer sags — and check it regularly. There should be about 5 mm of slack; an over-tight chain makes the freewheel stiff too.
DH chain tensioner
Section titled “DH chain tensioner”The Rohloff DH chain tensioner (Art. no. 8245) is made for downhill: 10 links of capacity, but with a shorter swing arm bolted to the hanger so it cannot rotate. That keeps the upper pulley very close to the sprocket, so the chain runs on securely even in extreme situations. The kit has seven spacers (4 × 1 mm, 2 × 3 mm, 3 × 0.2 mm) and two fixing bolts.
- Line it up with the chainline just like the standard tensioner.
- Put 4 × 0.2 mm or 1 × 0.5 mm spacers between the swing arm’s outer face and the bolt head — this locks the swing arm when the bolt is tightened.
- Loosen the fixing bolt and turn the swing arm until there is about 1 mm between the sprocket teeth and the upper pulley; tighten (5 mm, 8 Nm).
- To remove the rear wheel, the fixing bolt has to be loosened.
Chain guide
Section titled “Chain guide”Every bike with a chain tensioner needs a chain guide at the chainring, or the chain can come off.
Rohloff CC chain guide (Art. no. 8290) — adjustable for 52–62 mm chainlines, mounted on the seat tube at the height of the upper chain run.
- Seat tubes thinner than 36 mm need one of the three supplied reducer rings — the one for a 28.6, 31.8 or 34.9 mm tube — snapped round the tube at the height of the upper chain run.
- The distance X between the seat tube with its ring and the inside of the chainring gives the number of adjusting plates; number and thickness must match at both mounting points:
| X | 1 mm plates | 2 mm plates |
|---|---|---|
| 33 mm | 1 | 0 |
| 34 mm | 0 | 1 |
| 35 mm | 1 | 1 |
| 36 mm | 0 | 2 |
| 37 mm | 1 | 2 |
| 38 mm | 0 | 3 |
| 39 mm | 1 | 3 |
| 40 mm | 0 | 4 |
| 41 mm | 1 | 4 |
| 42 mm | 2 | 4 |
- The screws are M4×20 and M4×35, TX20, lightly greased, 3 Nm. The open side of the reducer ring goes in the gap between the two clamps.
- Leave about 5 mm between the rear spacer bushing and the chainring teeth, and have the chain run in the middle of the guide plates.
Rohloff DH chain guide (Art. no. 8291) — at the hub’s sprocket, it stops the chain dropping inwards onto the hub shell, and protects the shell too. It only works with a 55 mm chainline sprocket — not with the 13-tooth threaded or the 57 mm splined sprockets.
-
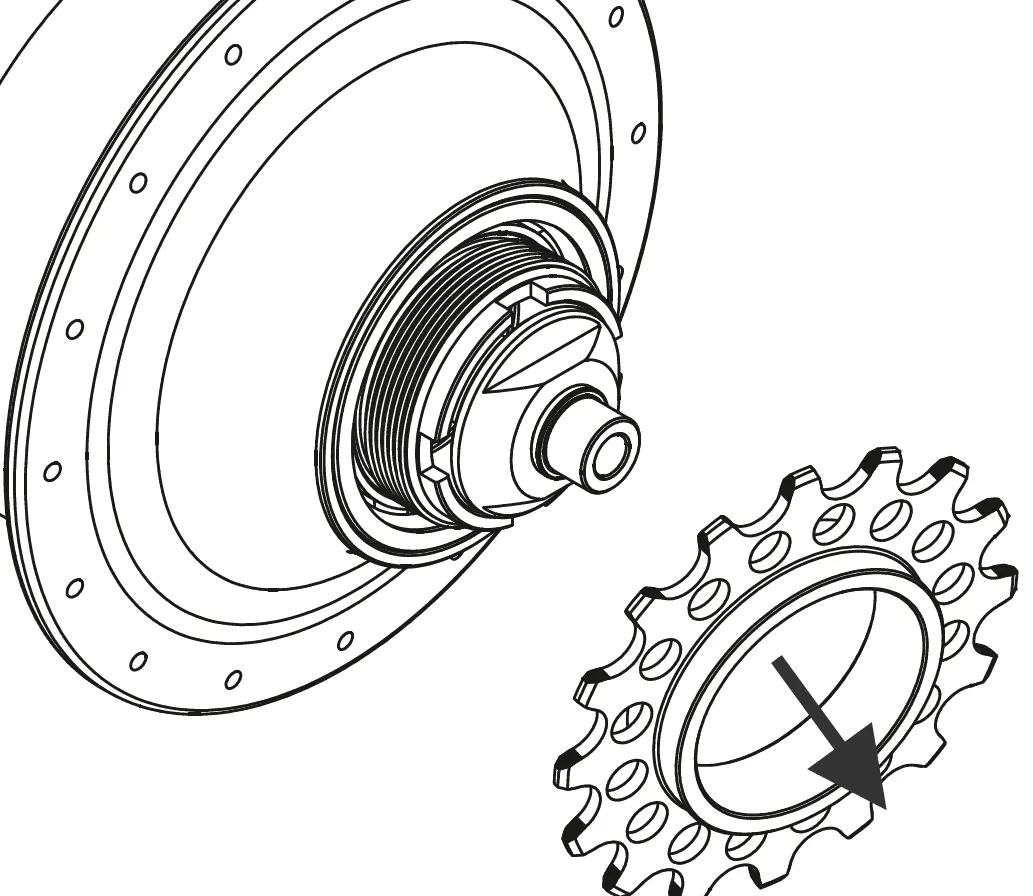
Remove the sprocket, clean it and grease its thread.
-
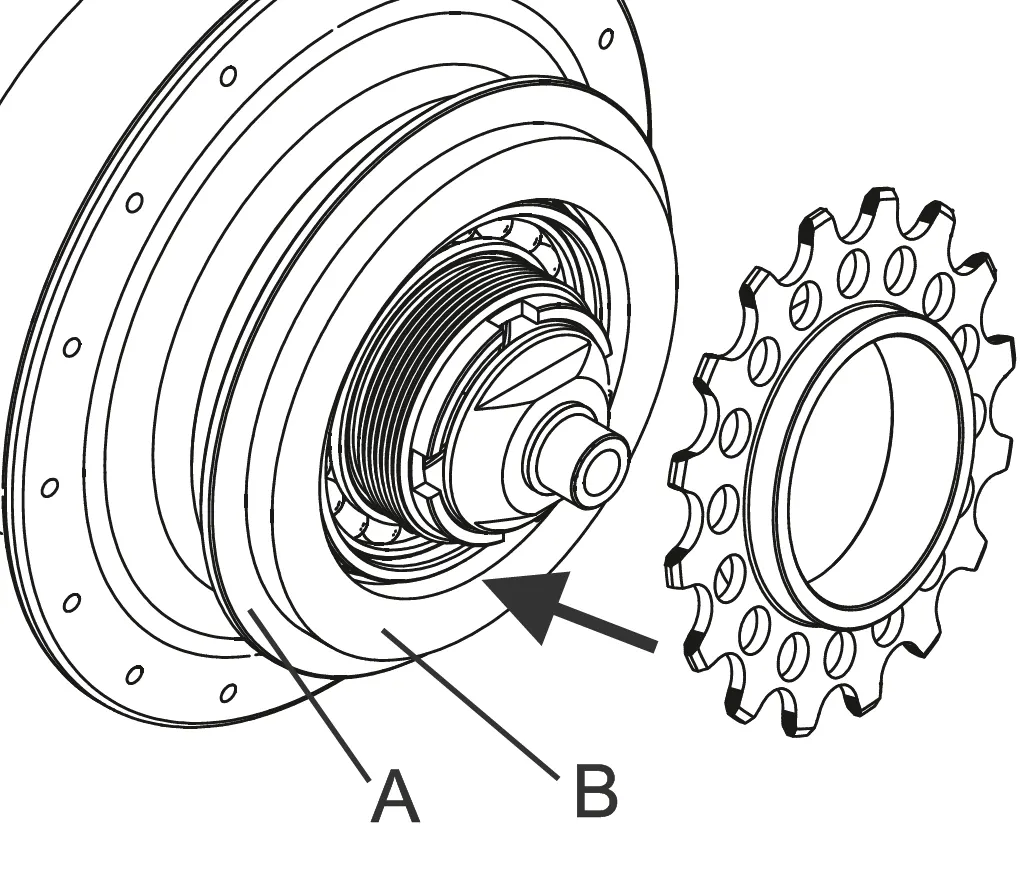
Put chain guide A and fitting ring B on the shell, and screw the sprocket on hand-tight — the fitting ring holds the guide at the right distance.
-
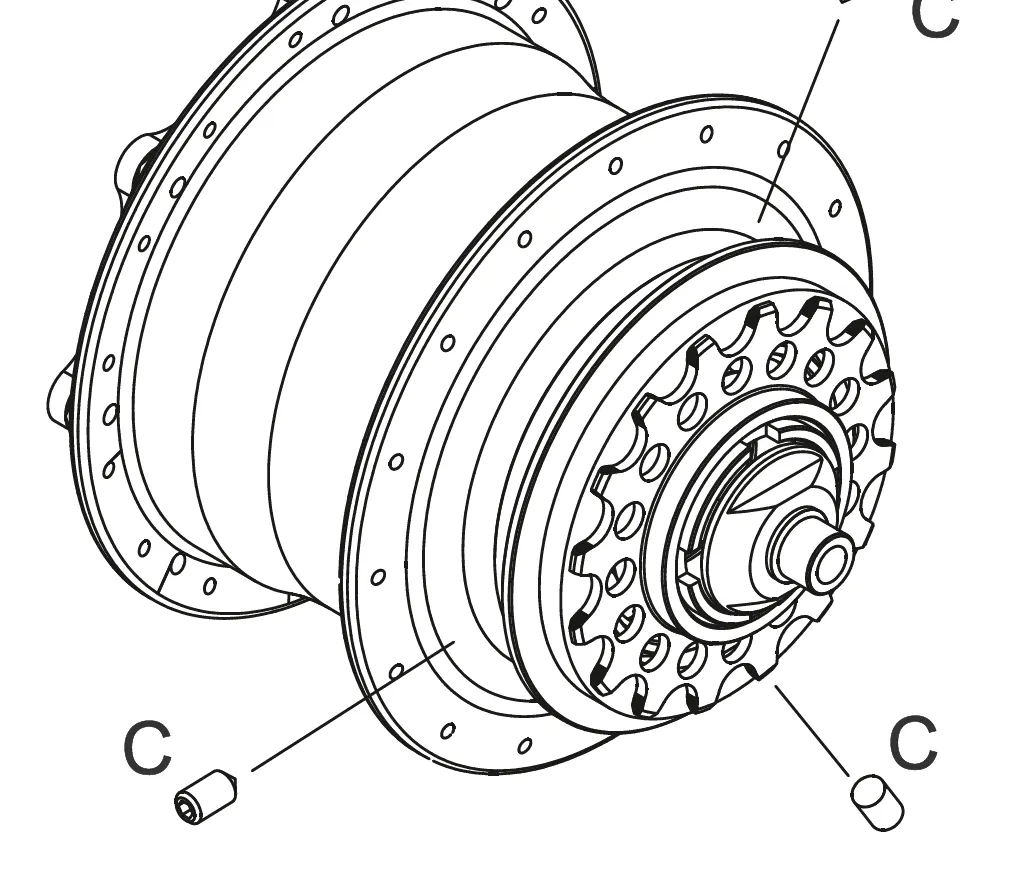
Put threadlocker on the three grub screws C (M4×8, 2 mm Allen), screw them in evenly until their tips touch the shell, then tighten them one more turn — the tips bite into the shell.
-
Back the screws off half a turn, unscrew the sprocket and take out the fitting ring — keeping the screw tips in the marks they made — then tighten each screw ¾ of a turn.
-
Grease the sprocket thread and screw the sprocket on tight.
Frequently asked questions
- When does a SPEEDHUB need a chain tensioner?
- Whenever the frame cannot tension the chain — no sliding Rohloff OEM dropout, no long enough horizontal dropout and no eccentric bottom bracket — and on every full-suspension frame. A bike with a chain tensioner also needs a chain guide at the chainring.